Gemstone in a Macramé Pouch
Background
People have long used natural materials such as bone, wood, shells, fibre or stone for artistic expression. Some of the most lasting creations have used rocks and minerals. Today, we can appreciate rock-based art created anywhere from many thousands of years ago to the present day because of the endurance of stone. From prehistoric pictographs (drawn or painted) and petroglyphs (carved) on cave walls and the famous Stone Age Venus figurines through to spectacular Greek friezes, intricately carved Asian temples (Angkor Wat) and Renaissance masterpieces, rocks and minerals have yielded incredible art.
Your kids can also produce works of art with rocks and minerals. First of all, they are natural collectors; how often do kids go home with rocks in their pockets? Ask them to use any rocks and minerals they have collected to create a short “show and tell” video to share. Naturally creative, they can then transform their rocks into beautiful pieces of art, with some additional lessons, guidance and resourcefulness.
Materials
- Waxed cotton or hemp cords
- Gemstones of your choosing
- Scissors
- Beads (optional)
Instructions
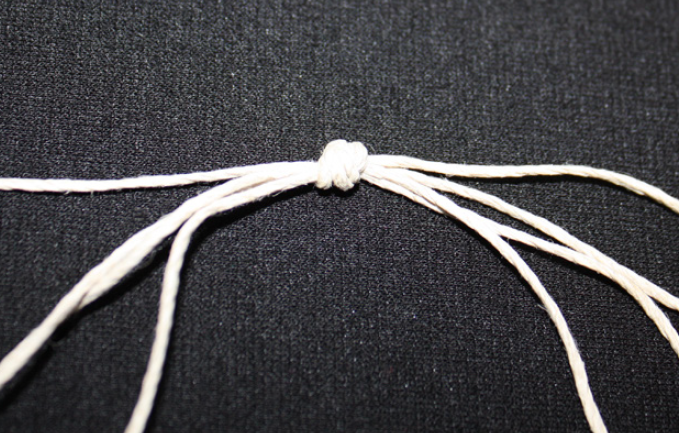
- Measure four equal lengths of cord. The length is determined by how long your teen desires the finished necklace to be. Keep in mind that knotting will take up some of the cord. Try using 125 to 150 cm to start with.
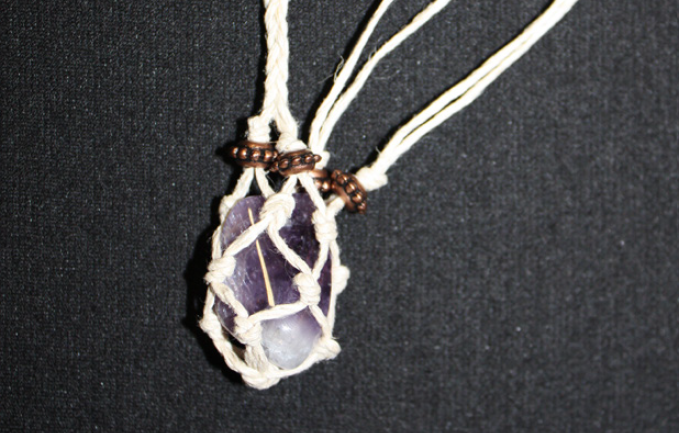
- Line up all four lengths of cord beside one another. Tie them in a knot in the centre with a single base knot. This will result in eight equal length strands to work with to create the gemstone pouch.
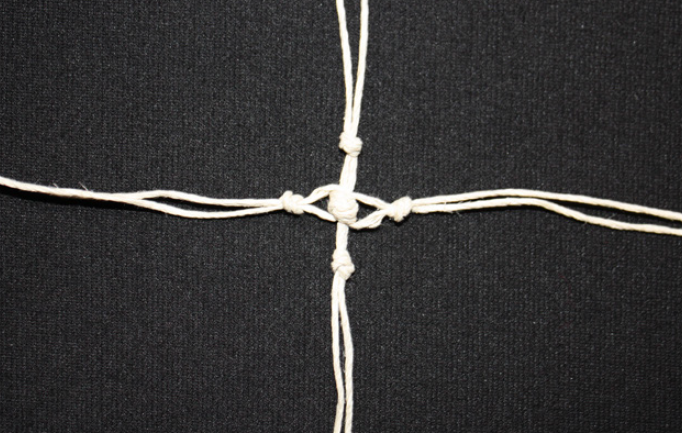
- Separate the strands into pairs and tie a knot in each pair; keep in mind the size of the gemstone you would like the bag to hold. If the gems are small, the paired knots should be tied closer to the base knot. This will result in a smaller weave, preventing stones from slipping out.
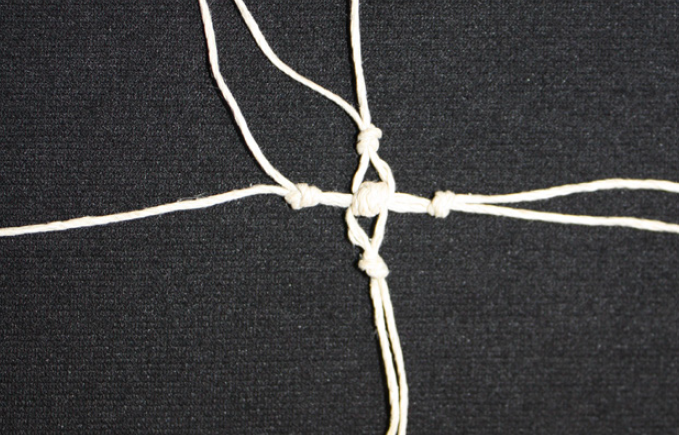
- From the initial set of paired knots, tie each strand to the neighbour it is not knotted to. Notice as you continue to do this that the pouch shape starts to form. Keep tying neighbouring strands together until the desired depth is achieved (refer to size of gemstone).
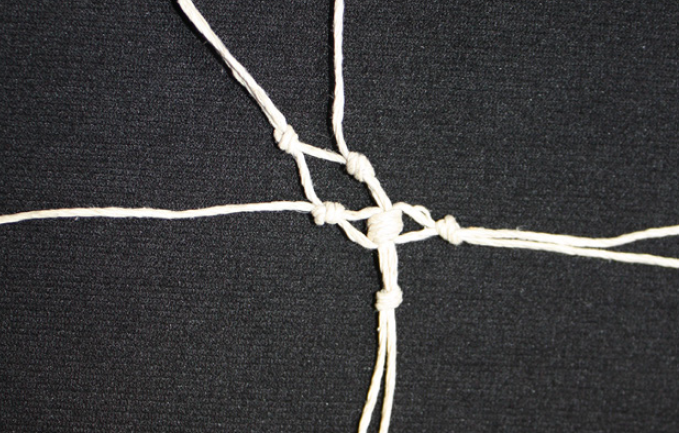
- Once the bag size for the stone is achieved, take four strands in each hand and tie a knot at the top of the pouch on each side. You will then have two necklace lengths, each with four strands.
- Using a four strand braid method, braid together the four strands on each side of the necklace. This step may take some time depending on the length of cord and your ability to braid.
tinyurl.com/4strand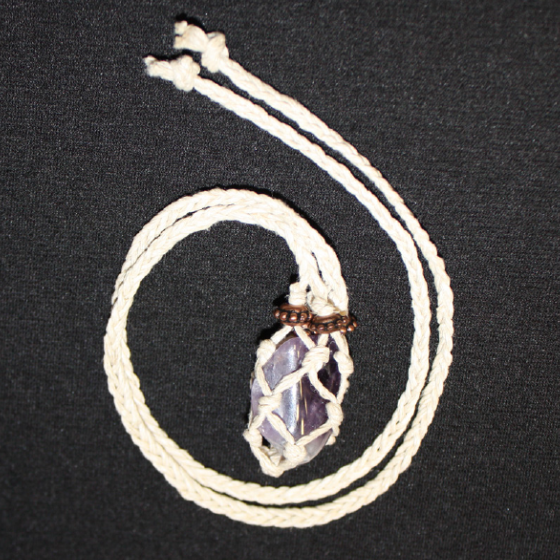
- Once braids are complete, slide one bead over both braided strands of the necklace, then tie a knot at each end of the braided sections to prevent them from unravelling.
- To finish, tie both ends of the braids together at the desired necklace length.
